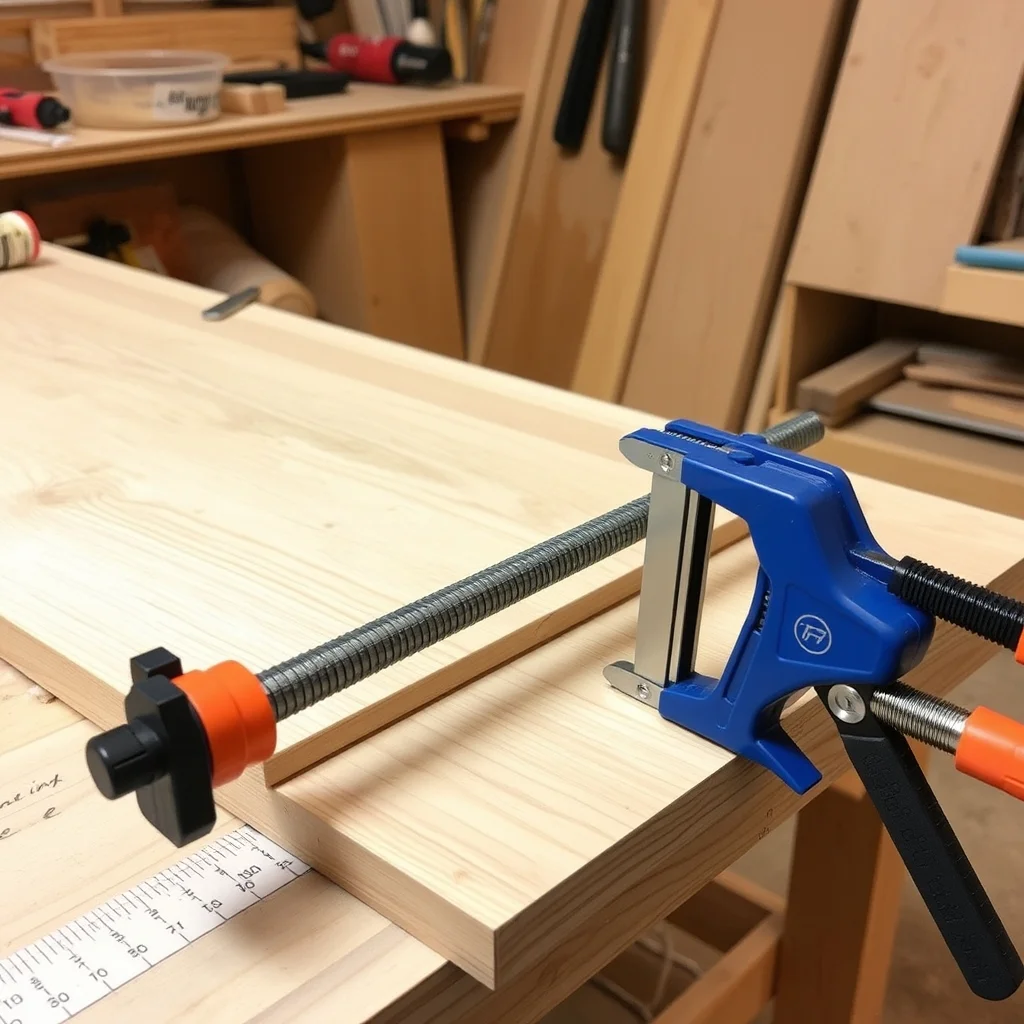
The four main clamp types and what they're designed to do
Woodworking clamps are distinguished by their opening mechanism, their throat depth, and the force they can generate at the jaw face. The type that suits you depends on what you're clamping, how wide it is, and how much you need to one-hand it during assembly.
Bar clamps (F-clamps)
F-style bar clamps have a fixed jaw on one end and a sliding head with a screw mechanism on the other. They're the most versatile general-purpose clamp: one jaw fixed, one adjustable, works well for face clamping, edge clamping, and holding jigs. Sizes run from 6 inches (for small assemblies) to 48+ inches (for table glue-ups). The key spec to check is throat depth — the distance from the bar face to the jaw face, which determines how far you can reach from the edge of the workpiece into its face.
Parallel clamps
Parallel clamps (sometimes called I-beam clamps or cabinet clamps) have wide, flat jaws that remain parallel throughout their travel. The Bessey K-body series established this design; Jet and other manufacturers offer comparable versions. The parallel jaw design matters in panel glue-ups because a non-parallel jaw (like a standard F-clamp) applies clamping force at an angle when tightened, which can bow the assembly. Parallel clamps apply force straight down across the joint.
The wide jaws also distribute force across a larger area, reducing the chance of denting softwood faces. For cabinet carcase glue-ups and face-frame assembly on flat panels, parallel clamps are the professional standard.
Pipe clamps
Pipe clamp fixtures mount on standard ½-inch or ¾-inch black steel pipe (plumber's pipe, available at hardware stores by the foot). The pipe is the bar — you cut it to any length you need. This makes pipe clamps uniquely scalable: buy a set of fixtures once, then cut any length of pipe you need for a specific project. A 6-foot pipe clamp for a dining table glue-up costs the fixture price plus a few dollars of pipe.
The drawback is that the round pipe gives the fixture some rotation — the jaws can twist slightly relative to the workpiece. On wide glue-ups, placing clamps alternating above and below the assembly (one on top, one on the underside) corrects for this tendency by counteracting the rotation forces.
Quick-grip (one-handed) clamps
One-handed clamps use a pistol-grip trigger mechanism to advance the jaw quickly without the other hand. The Irwin Quick-Grip series is the most common. They're fast and convenient for positioning parts during layout, holding stops and fences, and light-duty clamping during assembly where you're using your other hand for something else.
Quick-grips are not a substitute for screw-type clamps in a glue joint under pressure. The spring-loaded trigger mechanism generates significantly less clamping force than a screw clamp of the same jaw opening. They're a supplement, not a replacement, for the screw-based clamps that handle actual glue-up pressure.
| Type | Best for | Clamping force | Throat depth |
|---|---|---|---|
| Bar/F-clamp | General assembly, jigs, edge clamping | High (screw) | Typically 2–4 inch |
| Parallel clamp | Panel glue-ups, cabinet carcase | Very high, even distribution | Wide — 3–5+ inch typical |
| Pipe clamp | Long glue-ups, scalable projects | High (screw) | Variable by fixture type |
| Quick-grip | Positioning, light holding, one-handed | Lower (spring) | Varies |
Throat depth: the spec that most buyers miss
Throat depth is the distance from the bar (or beam) of the clamp to the face of the jaw — it determines how far from the edge of the workpiece you can place the clamping pressure.
For face-frame glue-ups where the clamp only needs to reach an inch or two from the edge, any depth is sufficient. But for a panel glue-up where you're gluing up 12-inch boards edge-to-edge and need even pressure across the joint, you want the clamp to reach the center. A bar clamp with 2-inch throat depth can't provide meaningful pressure 4 inches from the edge — the jaw lifts off the work before the clamp contacts the wood.
Parallel clamps from Bessey, Jet, and similar typically have 3.5–5 inch throat depths, which reaches adequately into most furniture-scale panels. For wide tableboards (12+ inches), cauls (long straight boards placed across the top and bottom of the glue-up to distribute force) let bar clamps work effectively even with shallow throat depth.
Shopping for woodworking clamps? Browse current eBay listings → (we earn a small commission; your price is unchanged).
How much clamping force do glue joints actually need?
Wood glues (PVA/yellow glue, Titebond, similar) require light to moderate pressure to close gaps and bring surfaces into tight contact — not extreme force. The squeeze-out you see at a glue joint when you apply clamps indicates the glue has distributed evenly; you don't want it all forced out. Typical recommendations for PVA glue on hardwood are 100–200 PSI for face grain joints and 175–250 PSI for edge grain joints.
A standard bar clamp turned hand-tight (no cheater bar) generates well over 1,000 lbs of force at the jaw — far more than needed for most furniture joints. The meaningful point: you don't need the most powerful clamps available, you need enough clamps, correctly spaced. Clamps spaced closer together distribute force more evenly and compensate for any jaw deflection better than fewer clamps tightened harder.
Clamp spacing for glue-ups
For edge-glued panels, the typical recommendation is to space clamps every 8–12 inches along the joint length. For very stiff boards (thick hardwood), closer spacing helps ensure full contact. For thinner or softer stock, the wood itself bridges the gap between clamps reasonably well at 12-inch spacing.
Panel glue-ups: pipe vs parallel — the honest comparison
For furniture-scale woodworking (tables, cabinet sides, door panels), the choice typically comes down to pipe clamps vs parallel clamps:
Pipe clamps are cost-effective and infinitely scalable. A set of 8 Pony or BESSEY pipe clamp fixtures costs significantly less than 8 parallel clamps. You can cut pipe any length and reconfigure for different project sizes. The trade-off is the rotation issue (which cauls and alternating above/below placement solve) and the slightly less refined jaw design.
Parallel clamps are better engineered for flat panel work. The parallel jaw design reduces bowing tendency, the wider jaws distribute force better, and the result is typically flatter glue-ups with less need for cauls. They cost roughly 3–5x more than pipe clamps of similar capacity. For a serious furniture shop where quality of glue-ups matters more than cost per clamp, parallel clamps are worth it.
For most hobbyists: start with 6–8 pipe clamps in 24–36 inch lengths plus 4–6 quality F-clamps in 12–24 inch sizes. This covers panel glue-ups and general assembly. Add parallel clamps if you find the pipe clamps producing bowed panels regularly, or if you build production-quality cabinets where surface flatness is critical.
Cauls: the clamp accessory nobody sells
Cauls are straight strips of wood placed across the face of a panel glue-up, perpendicular to the glue lines, to distribute clamping pressure and keep the assembly flat. They cost nothing — they're offcuts — but they make a meaningful difference in glue-up quality. A glue-up done with 8 pipe clamps and cauls will typically come out flatter than the same glue-up with 12 parallel clamps and no cauls, because cauls address the tendency of clamps to bow the assembly upward at the joints.
For serious flatness, wax the caul faces (so they don't glue to the panel) and apply them with their crowned face toward the work so the pressure concentrates at the joint rather than at the caul ends.
A practical starter set by project type
- Small projects (boxes, frames, small assemblies): 4× 12-inch F-clamps, 4× 24-inch F-clamps, 4× quick-grips in 12-inch. Covers most small-shop needs.
- Furniture and cabinetry: Add 6–8× 36-inch pipe clamp setups (fixtures + pipe) for panel glue-ups. Add 2–4× 48-inch parallel clamps for cabinet carcases.
- Large panels and tables: Pipe clamps in 48–60 inch lengths. 2-inch pipe is stiffer than ¾-inch and deflects less on very wide glue-ups.
Search eBay for woodworking clamps
 Parallel Clamps
Bessey, Jet, and similar. Verify jaw depth and screw mechanism smoothness on used units.
Parallel Clamps
Bessey, Jet, and similar. Verify jaw depth and screw mechanism smoothness on used units.
 Pipe Clamp Fixtures
Buy fixtures — cut your own pipe to length. Pony and Bessey are standard. Check ¾-inch vs ½-inch pipe size.
Pipe Clamp Fixtures
Buy fixtures — cut your own pipe to length. Pony and Bessey are standard. Check ¾-inch vs ½-inch pipe size.
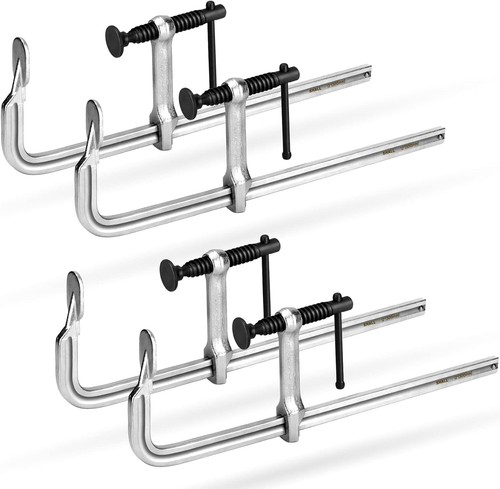 Bar Clamp Sets
F-style sets in mixed lengths. Check throat depth spec — usually listed in manufacturer descriptions.
Bar Clamp Sets
F-style sets in mixed lengths. Check throat depth spec — usually listed in manufacturer descriptions.