Switch lubing is one of the most discussed modifications in the mechanical keyboard hobby. Done correctly on the right switches, it transforms a scratchy or rattly typing experience into something noticeably smoother and quieter. Done incorrectly, it produces a mushy, indistinct feel that destroys the tactile or clicky feedback you were presumably buying the switch for in the first place.
The fundamentals are not complicated, but the hobby's tendency to treat lubing as an always-correct improvement has led to a lot of keyboards where the modification made things worse. The most important thing to understand before opening a switch is which switches should not be lubed at all.
What Lubing Actually Does
A mechanical switch has several surfaces that contact each other during actuation: the stem legs moving against the housing walls, the spring vibrating in the housing, and the contact leaf flexing. Without lubrication, these surfaces create friction and acoustic resonance — the scratchy feeling on linears, the spring ping on many switches, the rattle of loose stabilizers.
Lubricant reduces the friction between these surfaces. On a linear switch with no intentional feedback mechanism, this produces a smoother, quieter keystroke across the entire travel. On a tactile switch, it smooths the stem-housing friction without necessarily affecting the tactile bump — but it will reduce the bump's sharpness if you lube the wrong parts. On a clicky switch, it can eliminate the tactile-clicky mechanism entirely if you lube the click jacket.
The reason lubing is worth discussing seriously is that the improvement on linears is real and significant. A lubed linear switch feels categorically different from an unlubed one of the same model. An unlubed Gateron Yellow feels rough compared to a properly lubed one. That difference is why the modification became standard practice for linear switches.
Which Switches to Lube and Which to Leave Alone
| Switch type | Lube? | What happens |
|---|---|---|
| Linear (MX-style) | Yes — always worth it | Smoother, quieter, eliminates scratchiness. The modification that makes the most consistent improvement. |
| Tactile (bump-focused, e.g., Holy Pandas, Boba U4) | Yes — with caution, avoid stem legs | Housing walls and spring benefit. Lubing the stem legs reduces or eliminates the tactile bump — many prefer unlubed tactiles for this reason. |
| Tactile (light, e.g., Brown, Clear) | Minimal — very thin or skip | These tactiles have modest bumps that disappear quickly with any significant lube. Light spring lube only is the conservative approach. |
| Clicky (MX Blue, Green, Jade, Navy) | No — ruins the click | The click mechanism is the clicky switch's reason to exist. Lubing the click jacket or stem eliminates the click. Spring lube (very light) is the only safe application. |
| Box clicky (Kailh Box White, Pink, etc.) | No — same as above | Box clicky mechanisms are particularly sensitive to lube. Even incidental lube contact with the click bar can mute it. |
The clicky switch mistake
The most common lubing mistake is applying Krytox 205g0 to a clicky switch. The click mechanism in MX Blue-style switches is a click jacket that rides the stem — lubing it eliminates the tactile resistance that produces the click and snap. The resulting switch types like a mushy linear that also makes a dull noise. This cannot be easily reversed; the lube is inside the switch housing.
The Lubricants: What to Use Where
The keyboard community has largely converged on a small set of lubricants that are appropriate for switch use. The key variables are viscosity and composition — thicker lubricants are used for housing-to-stem contact on linears, thinner lubricants for springs and tactile switches, and specialized greases for stabilizer wires.
Krytox 205g0
The standard choice for linear switches. Krytox 205g0 is a medium-viscosity PFPE grease that provides consistent coverage, does not migrate out of position over time, and is chemically inert to the plastics used in MX-compatible switches. It is the correct choice for the housing bottom rails, housing walls, and stem rails on linears.
It is too thick for tactile switches — it fills in the areas around the stem legs and reduces bump sharpness. Applied to clicky switches, it kills the click. The viscosity that makes it ideal for linears is precisely what makes it damaging to other switch types.
Krytox 103 or 105 (oil)
Thin oil versions of Krytox are the right choice for springs. Springs vibrate at high frequency during keystroke actuation and produce what the hobby calls "spring ping" — a metallic resonance that is audible in some switches, especially in aluminum cases. A very small amount of thin oil applied to the spring (coating the coils) damps this resonance.
Thin oil is also the appropriate lubricant for tactile switches if you are lubing at all — it reduces friction without filling the geometry around the stem legs as aggressively as a grease.
Dielectric grease for stabilizers
Stabilizers require a different lubricant and a different application approach. The wire inserts and housing stems on plate-mounted and PCB-mounted stabilizers benefit from a thick grease that stays in place under the repeated high-force actuation of spacebar and large keys. Dielectric grease (generic silicone dielectric grease available at hardware stores) or dedicated keyboard stabilizer lubes (Permatex, Super Lube) are the standard choices here.
Stabilizer lube is a separate operation from switch lube. Stabilizers rattle for a different reason (the wire insert moving laterally in the housing) and require a different product and technique (thick grease on the wire ends, in the housing stems, and sometimes on the PCB contact surface).
How to Lube: The Actual Process
Opening the switches
MX-compatible switches open by pressing the two tabs on either side of the housing while pulling the top housing off. A dedicated switch opener makes this much faster than using a screwdriver or fingernail — for a full keyboard (65–100+ switches), an opener is worth having. The switch opener aligns the tabs and opens the switch with a single press.
Once open, the components are: top housing, bottom housing, stem, and spring. Linears have only these four. Tactiles have the same four, with the bump geometry built into the stem legs. Clickies have an additional click jacket that sits between the stem and the housing click leaf.
Where to apply lube on linears
For linears with 205g0:
- Bottom housing rails (the two parallel rails the stem legs ride on): a thin coat on each rail with a small brush. This is the surface that produces most of the scratchiness.
- Housing walls (the inner walls the stem body contacts): a thin coat on the front and back inner walls, not the sides.
- Stem legs (the two legs that extend down from the stem body): a thin coat on the outer surface of each leg.
- Stem body sides: optional, light coat on the four sides of the stem body that contact the housing walls.
- Spring: a drop of thin oil (105) on the spring coils, or bag lubing (put springs in a bag with a small amount of thin oil and shake).
Do not lube the contact leaf. Lubricating the contact leaf can cause inconsistent electrical contact and misfires. The leaf should stay dry.
Where to apply lube on tactiles
For tactile switches where you want to preserve the bump:
- Housing bottom rails — thin coat
- Housing walls — thin coat
- Do not lube the stem legs — this is what dampens the tactile bump
- Spring — thin oil
Some people choose to lube tactile stem legs intentionally to reduce a bump they find too sharp. This is a valid preference choice, not a mistake — but it produces a different switch. Know which outcome you want before you apply lube to the legs.
The Over-Lubing Problem
More lube is not better. The correct amount of 205g0 on a linear switch is a thin, almost translucent coat that you can see through. If you can see an opaque white coating, you have applied too much.
Over-lubed linears feel mushy — the stem movement has excess resistance from lube buildup, and the bottoming-out sensation becomes indistinct. Over-lubed tactiles lose their bump entirely and feel like slow, mushy linears. These are not desirable outcomes; they are what the hobby sometimes calls "205g0 soup" — every switch feels the same mediocre way.
The proper technique is to dip a small brush (a 00 or 0 size artist's brush works well) into the lube container, then wipe most of it off on the rim until only a thin film remains on the bristles. Apply with light strokes. You are transferring a very small amount of lubricant, not painting a surface.
Does It Actually Matter at Entry-Level?
A reasonably fair question is whether lubing is worth doing if you are building on a $60 keyboard with $25 worth of switches. The honest answer is: probably yes for linears, probably no for everything else.
The improvement on linear switches is real and perceptible regardless of price tier. A lubed Gateron G Pro linear genuinely feels better than an unlubed one of the same model. The time investment is about 30–60 minutes for a 65% keyboard if you have a switch opener, which costs $10–15. The lubricants themselves last essentially forever — a 5ml jar of 205g0 will last through dozens of keyboards.
For clicky or tactile switches: the entry-level argument for lubing is weaker. Stabilizer lubing is still worth doing at any tier — stabilizer rattle is consistently annoying and the fix is cheap and fast. Switch lubing on clickies is not recommended at any tier.
What "Properly Lubed" Sounds Like
A properly lubed linear keyboard has a deeper, thicker typing sound — sometimes described as "thocky" — with less high-frequency scratch. The individual keystroke sounds more like a muted press than a plastic-on-plastic scrape. This is audible on video comparisons and audible in person.
A properly lubed tactile keyboard with the bump preserved sounds similar to unlubed but with less scratchiness in the travel outside the bump. The bump itself sounds and feels crisper because the surrounding travel is smoother by comparison.
An over-lubed keyboard sounds muffled and dull. Bottoming-out sounds like pressing on foam rather than a distinct stroke. If this is what you have, the only fix is to open the switches and clean them — isopropyl alcohol removes most keyboard lubricants — and start over with less lube.
Lubing and modding gear
We earn a small commission on qualifying eBay purchases. Price you pay is unchanged. Full disclosure.
 Switch opener
Opens MX-compatible switches with a single press. Essential for lubing any volume of switches — doing it by hand with a screwdriver on 80+ switches is genuinely painful.
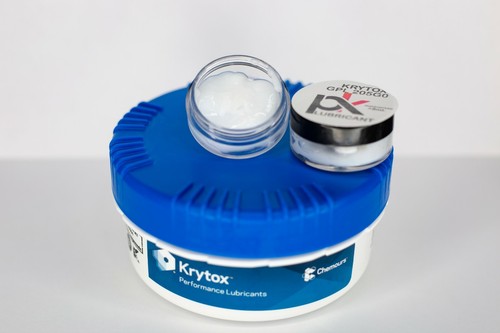 Krytox 205g0
The standard linear switch lubricant. A 5ml jar is more than enough for a full keyboard. Buy from a keyboard-specific vendor — the hobby market sells properly sized amounts.
 Switch tester / sampler
Before lubing a full set, test a single lubed switch alongside an unlubed one on a sampler to confirm you are applying the right amount and getting the feel you want.
 Switch lubing station
Holds individual switch components while you apply lube with a brush. Not strictly necessary but speeds up the process considerably when you are doing 80+ switches.
 Linear switches (bulk pack)
Gateron G Pro, Gateron Yellow, and Durock L7 are the go-to budget linears that respond well to lube. Buy 10% more than you need for the board in case of solder failures.