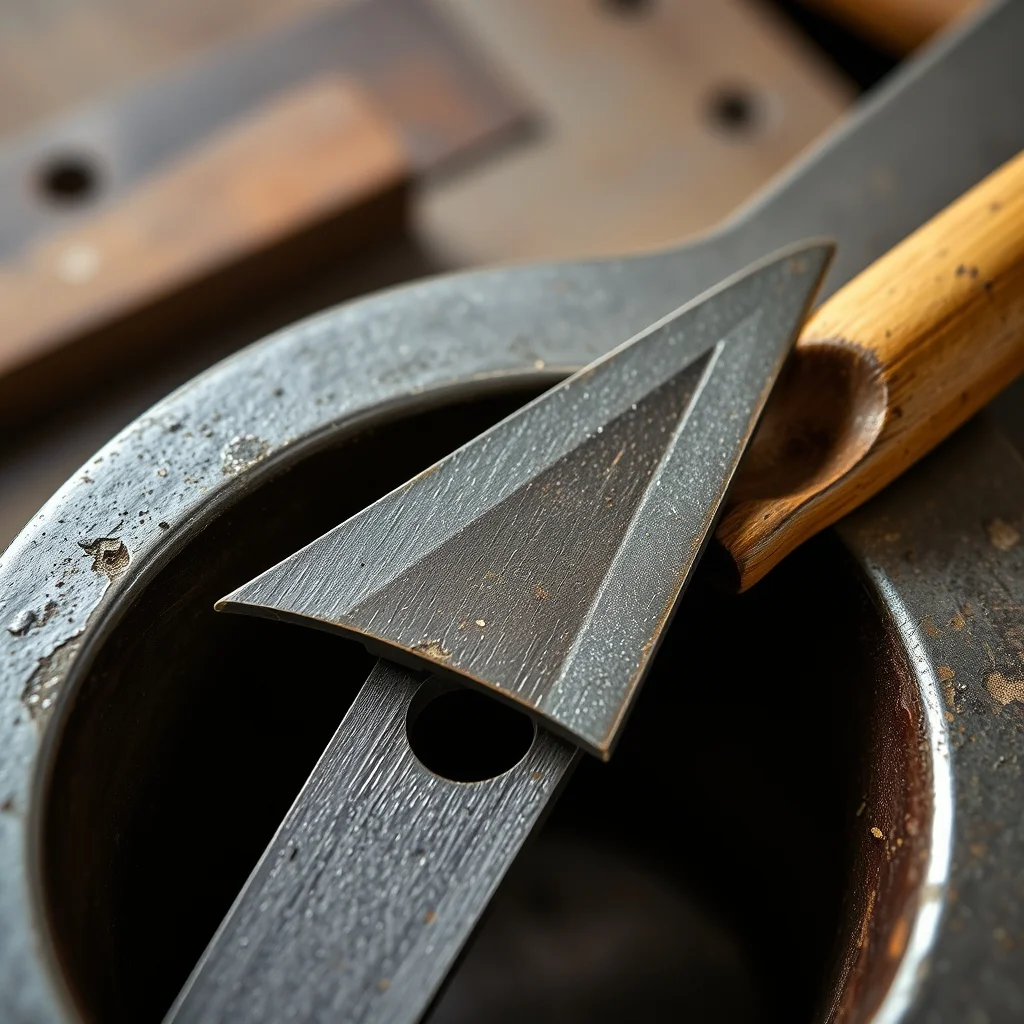
Saw sharpening is one of those skills where the barrier to entry is mostly psychological. The tools are inexpensive, the technique is learnable in an afternoon, and a properly sharpened vintage panel saw or crosscut saw cuts noticeably better than most new hardware-store saws. The actual work is slow and meditative rather than technically difficult — perhaps two hours for a full sharpen on a neglected saw, less once you've done it a few times.
The obstacle is usually uncertainty about the process and about whether a particular saw is worth the effort. This guide answers both.
What you're actually doing when you sharpen a saw
A hand saw cuts wood because each tooth acts as a small chisel, cutting and clearing a thin shaving. The teeth need three properties to do this well:
- Even height. If some teeth are taller than others, only the tallest ones cut. The rest drag and cause the saw to feel like it's fighting you. Jointing — running a flat file across the tooth tops to create a flat reference — addresses this.
- Correct set. Teeth are bent alternately left and right of the blade centerline. This creates a kerf (cut width) wider than the blade thickness, preventing the blade from binding in the cut. A saw that binds or wants to wander usually needs resetting.
- Sharp cutting edges. The actual chisel faces of each tooth need to be sharp. This is what the saw file addresses: you're filing new bevel faces onto each tooth's leading edge.
The order of operations matters: joint first, then set, then file. Filing before jointing wastes effort. Setting after filing removes some of what you filed.
Equipment needed
The tool list is short:
- Saw vise or shop-made equivalent. You need to hold the saw firmly with the teeth accessible and at a comfortable working height. A dedicated saw vise clamps in a bench vise. A workable substitute is two pieces of hardwood clamped on either side of the saw plate just below the tooth line, held in a bench vise. The saw must not vibrate during filing or the file won't bite cleanly.
- Mill file (flat, for jointing). A 6- or 8-inch single-cut mill file dragged along the tooth tops creates the flat reference line. You only need one stroke or two — just enough to see a flat bright spot on each tooth tip that proves they're at the same height.
- Saw file (triangular, sized to the TPI). Saw files are double-edged triangular files. The size needed depends on the teeth per inch (TPI) of the saw: larger teeth need larger files, smaller teeth need smaller files. A 5-inch slim taper file works for 7–11 TPI crosscut saws. A 4-inch extra slim taper works for 11–15 TPI. Using the wrong size produces rounded, poorly shaped gullets.
- Saw set tool. A plier-type saw set (Stanley #42 or equivalent) bends teeth to the correct angle. These are widely available used for under $20 and rarely wear out. Adjustable models handle the full range of TPI you're likely to encounter in a vintage collection.
| Saw TPI | File size | Common saw type |
|---|---|---|
| 5–7 TPI | 7" slim taper | Rip saw |
| 7–10 TPI | 6" slim taper | General crosscut panel saw |
| 10–13 TPI | 5" slim taper | Fine crosscut, carcass saw |
| 13–16 TPI | 4" extra slim taper | Dovetail saw, tenon saw |
Step 1: Jointing
Secure the saw in the vise with the teeth pointing up. Lay the mill file flat on the tooth tops and draw it lightly along the full length of the saw — heel to toe, keeping the file flat against the teeth. One or two passes is enough. Look at the tooth tips: every tooth should now have a small flat "bright spot" on its tip. If some teeth have no bright spot, they're low — they'll get sharpened up in the filing step.
Don't joint more than necessary. The goal is a reference, not to remove significant material. If you have a few teeth that are much taller than the rest, you can address them individually with the saw file before the full joint.
Step 2: Setting the teeth
Set is the amount the teeth are bent to each side. A saw that cuts straight through hardwood needs less set than one used for rough ripping through green softwood. For a general-purpose panel saw used on dried lumber, setting teeth at roughly 1.5× the plate thickness on each side is a reasonable starting point. Most adjustable saw sets have a numbered dial — for a 26-inch panel saw in the 8–10 TPI range, start with a mid-range setting and adjust after testing.
Set alternating teeth only in their pre-existing direction — one tooth bends left, the next right. Never try to reverse a tooth's direction without filing it first; you'll crack the tooth or plate.
Step 3: Filing
Filing angle depends on saw type:
- Rip saws (filing rip teeth): File the leading edge of each tooth perpendicular to the saw plate — zero rake angle (sometimes called "fleam"), 90° to the plate face. You're making the tooth face square to the direction of cut. File every tooth from one side only, alternating sides as you go down the saw.
- Crosscut saws: The teeth are filed at a fleam angle — typically 15–25° off perpendicular — which creates small knife points on each side of the tooth tip that slice wood fibers cleanly across the grain. The steeper the fleam, the more aggressive the crosscut action. 20° is a good starting point for general cabinet work.
The technique for both: position the file in the gullet between two adjacent teeth, pointing in the correct direction, and make 2–4 light strokes. Every stroke should be on the forward push only (files cut on the push, not the pull). When you see the bright flat from jointing disappear from the tooth tip — the tooth is sharp again. Move to the next gullet.
Don't over-file. The most common beginner mistake is filing too many strokes per tooth, which deepens the gullets unnecessarily and removes too much material. Two strokes is often enough on a saw that just needs a touch-up. On a completely dull or improperly filed saw, four to six strokes per tooth may be needed for the first pass.
Working from one side
On a crosscut saw, you file every other tooth from one side of the saw, then flip the saw in the vise and file the remaining teeth from the other side. This ensures each tooth's fleam faces the right direction for the alternating pattern. Mark the starting tooth with a felt pen so you don't lose track.
Testing and adjusting
Test on scrap wood. A well-sharpened crosscut saw should:
- Start easily with minimal downward pressure on the first stroke
- Cut straight without wanting to wander left or right
- Feel light and responsive rather than draggy or stiff
- Leave a clean, consistent kerf with fine, uniform sawdust (not coarse chips)
A saw that wants to wander to one side usually has uneven set — more set on one side than the other. The saw follows the side with more set because that side is taking a wider bite. Run the saw set tool down the side that's tracking wide, reducing set slightly on that side, and test again.
A saw that feels like it's binding in the cut without wandering usually has insufficient set overall — increase the set setting one notch and re-set the teeth.
When to replace instead of sharpen
Not every saw is worth sharpening. The honest triage criteria:
Kinked or bent plates
A saw plate that's bent along its length (you can see it by sighting down the flat face) can sometimes be straightened by a skilled tool restorer with a hammer and anvil. If the kink is severe — more than about 1/4 inch of deflection in a 26-inch saw — the saw will cut a curved kerf regardless of how well the teeth are sharpened. A bent saw is usually not worth the effort to restore unless it's a particularly nice example.
Toothline that's been ground, not filed
Some older saws were "sharpened" with an angle grinder or a rotary tool, which removes material quickly but leaves ragged, inconsistent tooth profiles. If the tooth spacing is irregular, the gullets have inconsistent depths, or the tooth tips look chewed rather than filed, you can often rescue the saw with a full re-toothing (filing every tooth back to a uniform shape from scratch) — but this adds 2–3 hours to the process and requires some saw-filing experience.
Replacement vs. value
A vintage Disston, Atkins, or Henry Griffiths panel saw in reasonable mechanical condition — straight plate, original handle, readable etch — is worth sharpening and using. The same saw, badly damaged or of unknown origin with a replaced handle, may not be worth more than the $5–15 you'd pay for it at a tool sale. New reproductions of traditional hand saws from makers like Lie-Nielsen or Veritas start around $160–$225 and come sharp, tuned, and ready to use. The economics of sharpening favor vintage quality over cheap vintage.
Gear actually worth buying
Files, vises, and setting tools for saw sharpening. We earn a small commission on qualifying eBay sales; your price is unchanged. Full disclosure.
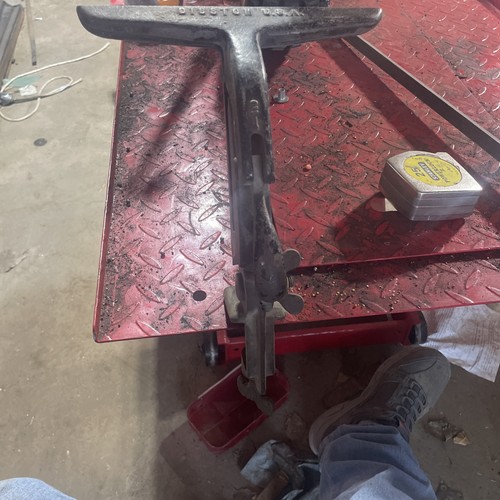 Saw filing vise
A dedicated saw vise holds the plate steady for filing. Vintage cast-iron versions (often unmarked or with maker marks) work as well as new ones. Search "saw vise" — metal/wood styles both function.
Saw filing vise
A dedicated saw vise holds the plate steady for filing. Vintage cast-iron versions (often unmarked or with maker marks) work as well as new ones. Search "saw vise" — metal/wood styles both function.
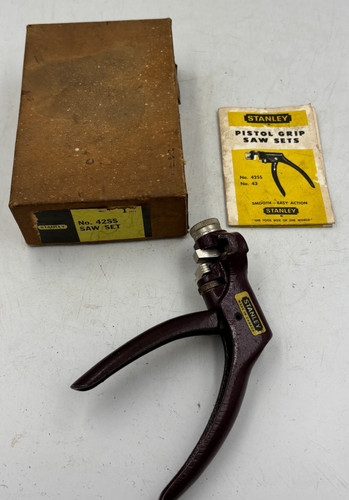 Stanley No. 42 saw set
The standard adjustable saw set for hand saws. Handles 4–12 TPI. Widely available used in good condition for under $20. Adjusts with a numbered dial — set for the TPI of your saw.
Stanley No. 42 saw set
The standard adjustable saw set for hand saws. Handles 4–12 TPI. Widely available used in good condition for under $20. Adjusts with a numbered dial — set for the TPI of your saw.
 Slim taper saw file assortment
Triangular saw files in a range of sizes (4", 5", 6", 7") cover the full range of vintage hand saws. Nicholson and Grobet are reliable brands. Files dull — replace after 2–3 full sharpening sessions.
Slim taper saw file assortment
Triangular saw files in a range of sizes (4", 5", 6", 7") cover the full range of vintage hand saws. Nicholson and Grobet are reliable brands. Files dull — replace after 2–3 full sharpening sessions.
 Disston D-8 panel saw (vintage)
The Disston D-8 is the standard against which other panel saws get measured — well-made steel, good hang angle, and widely available. A good candidate for sharpening practice if you find one cheap.
Disston D-8 panel saw (vintage)
The Disston D-8 is the standard against which other panel saws get measured — well-made steel, good hang angle, and widely available. A good candidate for sharpening practice if you find one cheap.
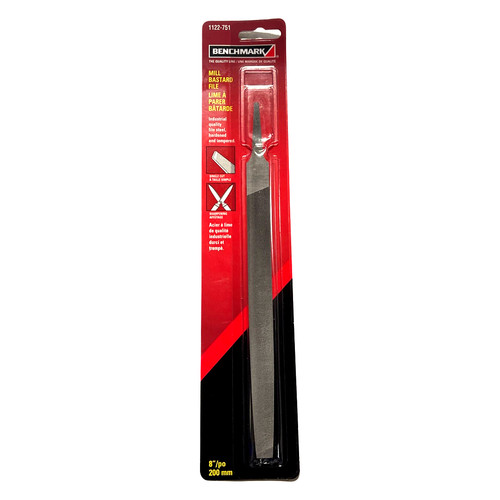 Mill file (flat, for jointing)
Any flat single-cut mill file works for jointing saw teeth. An 8-inch bastard-cut mill file is the go-to. Lay it flat across the teeth and make 1–2 passes to establish a reference height.
Mill file (flat, for jointing)
Any flat single-cut mill file works for jointing saw teeth. An 8-inch bastard-cut mill file is the go-to. Lay it flat across the teeth and make 1–2 passes to establish a reference height.