
The CLA question: understand it before you look at any camera
CLA stands for Clean, Lubricate, and Adjust — a standard service procedure for mechanical film cameras. A CLA involves disassembling the camera's shutter and focusing mechanisms, cleaning all parts, applying fresh lubricant to moving parts, and calibrating the shutter speeds and rangefinder alignment. For most vintage cameras, a competent CLA is the single maintenance operation that determines whether the camera performs reliably.
CLA cost varies by technician and camera, but for the cameras in this guide, expect to verify current pricing from qualified technicians — figures in the $150–$400 range appear commonly cited for Leica M bodies and Hasselblad lenses, but these change and vary by service provider. The point is not the specific number: it's that a camera sold as "working, shutter fires" that hasn't been serviced in 15+ years may need a CLA within a few rolls of film. Factor this into your offer or budget it explicitly before buying.
Leica M rangefinder: the critical checks
Rangefinder alignment
The rangefinder patch in a Leica M is a small bright spot in the viewfinder that coincides with the central autofocus frame. You focus by aligning the double image in this patch — when the two images merge into one, the lens is focused at that distance. A misaligned rangefinder means the distance at which the patch aligns doesn't match the distance the lens is actually focused on — your sharp plane lands in front of or behind your subject.
Testing rangefinder accuracy without shooting film: aim at a subject at a known distance (10 feet, for example) while watching the rangefinder patch. Align the patch for "in focus" — then look at the lens's distance scale. The distance scale should agree with where you pointed. At longer distances (15 feet and beyond), small misalignments become less critical due to depth of field. At closer ranges (3–5 feet, the zone used for portraits and environmental photography), even a small rangefinder offset will produce consistently out-of-focus images. Test the camera at close range before trusting it.
Shutter curtain condition
The Leica M uses horizontally-traveling titanium or rubberized cloth shutter curtains. Open the camera back (no film loaded) and hold it up to a light source. Any pinholes in the curtains — tiny dots where light passes through — will fog film at the corresponding position on every frame. On cloth curtains, a common failure is the rubberized coating cracking with age, creating hairline light leaks. This isn't always visible to the naked eye; a bright light source from the back reveals it clearly.
Film advance and rewind feel
Advance the film lever and listen for smooth, even resistance. Grinding, clicking, or irregular resistance indicates wear or debris in the mechanism. The rewind knob should turn smoothly with light resistance when rewinding (with the sprocket release engaged). Very stiff rewinding suggests the camera may not be loading or advancing film correctly under load.
Hasselblad 500CM: the system approach
The Hasselblad 500CM is a modular 6×6 medium format system — body, lens, and film back are separate components, each of which can have its own issues. When buying a complete system, you're evaluating three separate mechanical devices.
Body: mirror damper and advancing mechanism
The mirror damper in a 500CM is a small foam pad that cushions the mirror's upswing during exposure. This foam degrades with age and often disintegrates into sticky residue that gets onto the mirror itself. A dark, dirty mirror visible through the lens mount when looking from behind is a telltale sign. Mirror damper replacement is a simple service item but confirms the camera needs work.
Fire the shutter (without a back loaded) and listen to the mechanism. The 500CM uses a lens-mounted between-the-lens shutter (Synchro-Compur or Prontor CF depending on the lens), which means the shutter is in the lens, not the body. The body mechanism advances the film back and cocks the lens shutter via a mechanical coupling. A sticky or slow mechanism suggests the lubricant has thickened — common in cameras that have sat unused for years.
Lens: the A-series Carl Zeiss optics
Hasselblad lenses in the V-system mount are among the most valuable parts of the system. The standard lens is typically the 80mm f/2.8 Planar or Distagon; the 150mm f/4 Sonnar is a common portrait lens. For each lens:
- Hold the lens up to a light source and look through the front element at an angle. Fungus appears as dendritic (branch-like) grey or white patterns inside the glass elements — not on the surface, but within the optical assembly. Mild fungus can affect contrast; severe fungus cannot be cleaned without risking coatings.
- Look for lens separation (delamination between cemented elements) — appears as a newton ring pattern or irregular iridescent clouding between elements.
- Test all shutter speeds. Slow speeds (1/8 second, 1/4 second, 1 second) should sound distinct and measurably different. Uniform-sounding speeds at the slow end indicate a sticky shutter that's defaulting to approximately the same speed regardless of setting.
Film back: light seal foam
The Hasselblad film back uses light-sealing foam around the back door. This foam degrades universally with age — it becomes sticky, crumbles, or hardens. Open the back (with no film loaded) and inspect the foam channel around the perimeter. Sticky or absent foam means the back leaks light and will fog film along the edges. Replacing the foam is a straightforward DIY task (kits are available) or a minor service item — but it means the back needs attention before use.
Rolleiflex TLR: the twin-lens ritual
A Rolleiflex twin-lens reflex has two lenses: the viewing lens (used to compose and focus through the ground glass on the top plate) and the taking lens (which actually exposes the film). The two lenses are coupled mechanically so that focusing one focuses both — but they are separate optical elements, and the taking lens is what determines image quality.
Viewing vs taking lens
Inspect both lenses independently. The viewing lens is less critical — fungus or minor issues in the viewing glass affect only the ease of composing, not the final image. The taking lens is what matters for the photograph. In a Rolleiflex 2.8F (considered the premium variant), the taking lens is a Carl Zeiss Planar 80mm f/2.8. Look through the taking lens with a light source behind it, at an angle, for fungus and element separation.
Focus screen
Look down through the top of the camera (the reflex mirror redirects the viewing lens image to the ground glass on top). The ground glass should be evenly bright across its surface. A dark vignetting pattern around the edges indicates a delaminated or degraded Fresnel screen (many Rolleiflexes use a combined ground glass and Fresnel lens). The Fresnel dramatically improves viewing brightness; if it's delaminated, the ground glass is still usable but much dimmer.
Film advance and counter
The Rolleiflex advances 120 film via a friction system combined with a ruby window inspection method (for older models) or an automatic film advance stop (on later models). With no film loaded, advancing should feel smooth. Check that the frame counter resets to the correct starting position.
| Camera | First check | Critical failure | Likely service need |
|---|---|---|---|
| Leica M6 | Rangefinder alignment at close range | Curtain pinholes | CLA if not recently serviced |
| Hasselblad 500CM | Mirror damper condition | Lens fungus or separation | CLA, foam seals, possible shutter service |
| Rolleiflex 2.8F | Taking lens for fungus | Lens delamination | CLA, Fresnel replacement if needed |
| Nikon F2 | Shutter speed accuracy | Corroded battery contacts | CLA for meter accuracy |
| Canon AE-1 | Mirror box squeak | Foam light leak | Foam seals, CLA if squeaking |
Lens fungus: when it matters and when it doesn't
Fungus severity is a spectrum, not a binary. Light surface contamination on the outer coating of a rear element, well away from the center, may produce no measurable effect on real images — particularly at smaller apertures where the light path doesn't pass through the affected area at an oblique angle. Moderate fungus in the center of an element, or between elements where cleaning is impossible without disassembly, will visibly reduce contrast at high-contrast boundaries and produce glow or flare in backlit situations. Heavy fungus can etch glass coatings permanently.
The practical test: if you're buying in person, shoot a roll through the camera before committing. Alternatively, if possible, borrow a light source and examine the lens at f/2.8 wide open — project a light through the rear and look for differential diffusion in the exit beam. Any scattering in the center of the beam indicates optical contamination.
When to walk away versus negotiate
Walk away if: the rangefinder patch in a Leica M is clearly misregistered and the seller doesn't acknowledge it or won't adjust price accordingly. Walk away if: there's lens fungus in the center of a critical element in an expensive lens — cleaning risk is real and the optic may be permanently damaged. Walk away if: the Hasselblad's shutter in any lens fires uniformly at all speed settings (speeds ranging from B to 1/500 should sound clearly different; uniform speed means a stuck governor).
Negotiate for: minor external wear, cosmetic paint loss on a body (brassing), degraded light seals that you plan to replace yourself, or a camera that's clearly CLA-due but mechanically intact. These items have clear costs to remediate and you can ask the seller to price them in or subtract the service cost from your offer.
Search eBay for these cameras
![[MINT w/strap] Leica M6 0.85 TTL Black Rangefinder Film Camera From JAPAN](https://i.ebayimg.com/images/g/q68AAeSwFARqMkkW/s-l500.jpg) Leica M6 rangefinder
1984–2002. TTL metering. Verify rangefinder alignment before buying.
Leica M6 rangefinder
1984–2002. TTL metering. Verify rangefinder alignment before buying.
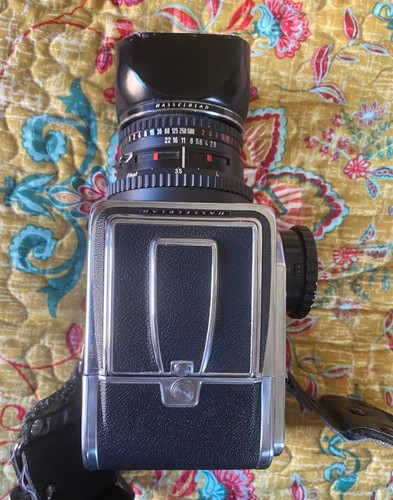 Hasselblad 500CM
Modular 6×6. Check mirror damper, film back seals, and lens shutter.
Hasselblad 500CM
Modular 6×6. Check mirror damper, film back seals, and lens shutter.
 Rolleiflex 2.8 TLR
2.8F with Zeiss Planar is the reference variant. Inspect taking lens for fungus.
Rolleiflex 2.8 TLR
2.8F with Zeiss Planar is the reference variant. Inspect taking lens for fungus.
![[MINT+++] Nikon F2 Photomic Black DP-1 SLR 35mm Film Camera Body From JAPAN](https://i.ebayimg.com/images/g/nKgAAeSwEiJqOXcx/s-l500.jpg) Nikon F2 35mm SLR
Fully mechanical. Runs without battery. Widely serviceable.
Nikon F2 35mm SLR
Fully mechanical. Runs without battery. Widely serviceable.
 Canon AE-1 vintage 35mm
Most common 35mm SLR on the used market. Check for mirror box squeak.
Canon AE-1 vintage 35mm
Most common 35mm SLR on the used market. Check for mirror box squeak.