Carburetor diagnosis: won't start vs runs rough vs won't idle, and the systematic float-bowl test

A carburetor is a fuel-metering device. When something goes wrong with fuel delivery, the failure symptoms are specific enough that a methodical test tells you exactly what's broken — before you start replacing parts.
Before the carburetor: rule out non-carb causes
Carburetor diagnosis comes after you have confirmed three things. Skipping this sequence is how people spend $30 on a rebuild kit and discover the actual problem was a $4 spark plug.
- Fresh fuel. Ethanol-blended fuel (E10) left in a small engine for more than 30 days begins to degrade. After 60 days in a sealed tank it can turn to varnish that coats carburetor passages. This is the single most common cause of small engine problems across lawnmowers, chainsaws, trimmers, and generators — not a worn carburetor, but fuel that degraded while the equipment sat. Drain old fuel completely and add fresh before diagnosing anything else.
- Spark. Remove the spark plug wire, connect it to a spare plug, hold the plug threads against a metal ground on the engine, and pull the rope. You should see a bright blue spark. A yellow, weak, or intermittent spark points to ignition problems (ignition coil, kill switch wire grounding out, points gap on older engines) — not the carburetor.
- Compression. Thread a compression tester into the spark plug hole and pull the rope several times. Most 4-stroke small engines should read 90 PSI or higher. Below 60 PSI indicates ring wear, a stuck valve, or a blown head gasket. No carburetor adjustment or rebuild will fix a mechanical compression problem.
If fuel is fresh, spark is strong, and compression is adequate — proceed to the carburetor.
The three symptom patterns and what they mean
| Symptom | Most likely carburetor cause | Non-carb causes to rule out first |
|---|---|---|
| Won't start at all | No fuel reaching engine (float stuck closed, blocked main jet, blocked fuel line) | Bad spark, no compression, fuel shutoff closed, flooded engine |
| Starts but runs rough, surges, or stalls under load | Partially blocked main jet; air leak at carb mount; weak fuel pump | Dirty air filter, fouled plug, governor issue |
| Starts but won't idle (dies when throttle released) | Blocked idle circuit, misadjusted idle mixture screw, air leak | Idle speed set too low, throttle cable binding |
The float-bowl test: step by step
The float bowl is the bottom chamber of the carburetor that holds a small reserve of fuel. Removing it takes 2–5 minutes and tells you more about your fuel delivery problem than any other single test.
Step 1: locate and drain
On most 4-stroke small engines (Briggs & Stratton, Honda GX series, Kawasaki, Kohler), the float bowl is the bottom of the carburetor body — a small aluminum or zinc cup held on by a single center bolt or a bail wire clip. Turn the fuel shutoff to OFF before removing. Place a rag or small container underneath to catch fuel.
Step 2: read the fuel level in the bowl
With the bowl removed and fuel shut off open briefly to let fuel flow:
- Bowl is empty when shutoff is open: the needle and seat are stuck closed (debris or varnish), the fuel line is kinked or blocked, or the fuel cap vent is plugged (creating a vacuum in the tank — loosen the cap and try again).
- Bowl is overfull and fuel is dripping from the air filter: the float is sunk or the needle is worn. Fuel is flooding through the carburetor continuously. This often causes a fuel smell when the engine sits and can hydro-lock a cylinder if severe.
- Bowl has correct fuel level (partially full, 1/3 to 1/2): fuel delivery is working. The main jet is the next thing to check.
Step 3: inspect the bowl interior
Hold the bowl up and look at the inside surface and the bottom:
- Brown or tan varnish coating: old fuel breakdown products. The jet passages are almost certainly partially or fully gummed. You will need to clean or replace the carburetor.
- White or green corrosion: water contamination in the fuel. Water sinks to the bottom of the bowl (fuel is lighter) and collects there. Drain, dry, and use fresh fuel with no ethanol if available.
- Brown sediment at the bottom: rust from the fuel tank. The tank and fuel filter need attention before the carburetor will stay clean.
Step 4: remove and inspect the main jet
With the bowl off, the main jet is visible at the center of the carburetor body — a small brass fitting threaded into the carb body, with a precisely sized hole through the center called the jet orifice. Use a correctly sized flathead screwdriver (the wrong size will damage the soft brass slot).
Remove the jet and hold it up to light. The hole should be clearly visible as a bright circle. If you cannot see light through it, the jet is blocked.
If the jet is blocked by varnish: soak in commercial carburetor cleaner for 15–30 minutes, then blow dry with compressed air. Reassemble and test before deciding to rebuild or replace.
How the float works and how it fails
The float is a hollow chamber (plastic on most modern carbs, brass on older Briggs and Tecumseh designs) that floats on fuel in the bowl. As the fuel level rises, the float rises and presses a rubber-tipped needle into a brass seat, stopping fuel flow. As fuel is consumed, the float drops, the needle unseats, and fuel flows in. It is exactly the same mechanism as a toilet tank ballcock.
Sunk brass float
Older brass floats can develop pinholes and fill with fuel. The test: remove the float, hold it near your ear, and shake it gently. If you hear or feel liquid sloshing inside, the float is sunk. A sunk float cannot rise to close the needle — fuel floods in continuously. Replace the float; they are typically $4–8 and available in rebuild kits.
Stuck plastic float
Plastic floats can warp slightly from fuel exposure or get gummed in a fixed position by varnish deposits on the pivot pin. If the float moves but feels stiff or catches, clean the pivot area with carburetor spray cleaner and work it free. A diagnostic trick: with the engine running and idling rough, tap the side of the carburetor body with a screwdriver handle. If the engine speed changes momentarily, the float was stuck and jarred loose.
Worn needle tip
The needle tip is rubber. Over years of use, it develops a groove or flat spot where it contacts the brass seat, and no longer seals completely when the float is at the high position. Fuel continues to seep in slowly. The symptom is a carburetor that floods when the engine sits for a few minutes and is hard to start, or fuel that leaks from the overflow tube. Any needle with a visible groove on the rubber tip should be replaced.
Float height: what it controls and how to set it
Float height determines the fuel level in the bowl. Too low: the engine starves at high throttle or runs lean at idle. Too high: the engine runs rich, smokes, fouls plugs, and may flood.
To measure: remove the bowl, hold the carburetor body inverted (bowl side up), and let the float hang down under gravity with the needle seated but not compressed by the float weight. Measure from the carburetor body gasket surface to the lowest point of the float.
Manufacturer specs vary widely (5/32 inch to 13/32 inch are common ranges across different engines). Look up the spec for your specific model number before adjusting. The adjustment is made by gently bending the small metal tang on the float body that contacts the needle tip — bend it toward the needle to lower the float position (richer), away to raise it (leaner).
Bend in very small increments — 1/32 inch of tang movement changes float height significantly. Recheck after each adjustment.
The won't-start quick test: starting fluid confirmation
If spark and compression are confirmed but the engine won't start, use starting fluid to determine whether the carburetor is the problem or something else.
- Remove the air filter.
- Spray a 1–2 second burst of starting fluid (or choke cleaner spray) directly into the carburetor throat opening.
- Replace the air filter and pull the rope immediately.
- If the engine fires briefly — even a single pop or a 2-second run — then dies: the engine is mechanically fine and the carburetor is not delivering fuel. Proceed with the float-bowl test and jet inspection.
- If the engine does not fire at all with starting fluid: the problem is ignition or compression. Stop diagnosing the carburetor.
Runs rough / surges: the main jet and air-leak check
An engine that starts and runs at high throttle but surges, hesitates, or loses power under load typically has one of three causes.
Partially blocked main jet
The jet is not fully clogged (or the engine wouldn't start) but the restricted flow can't supply enough fuel when throttle demand increases. The symptom: engine pulls hard at full throttle for a few seconds, then the mixture leans out, power drops, and it may surge or stall. Clean or replace the main jet.
Air leak at the carburetor mount
A cracked or shrunken intake gasket or a loose carburetor mounting bolt allows unmetered air to enter the intake downstream of the carburetor. This leans the mixture unpredictably — the carburetor can't compensate because the air isn't passing through the carburetor throat. The symptom is surging that gets worse as the engine warms up (heat shrinks soft gaskets further).
Diagnosis: with the engine running and surging, spray a brief burst of carburetor cleaner or starting fluid around the carburetor mounting flange and intake manifold joints. If the engine speed changes momentarily — faster if the spray richens the mixture — you found an air leak. Fix: replace the intake gasket, or apply a small amount of high-temp RTV sealant around the flange as a temporary measure.
Weak fuel pump (engines with fuel pumps)
Engines with the fuel tank below the carburetor use a vacuum-operated fuel pump. These fail with age and the diaphragm cracks. Symptom: engine runs fine at idle and low throttle, then starves at high throttle demand. Test: remove the fuel line at the carburetor inlet and crank the engine — you should see a strong pulse of fuel with each engine cycle. A weak or absent pulse means pump diaphragm failure. Replacement pumps are typically $12–25.
Won't idle: the idle circuit and mixture screw
When an engine starts and runs at high throttle but dies the moment you release the throttle to idle, the idle fuel circuit is the problem. At idle, the throttle plate is nearly closed — the main jet is not delivering fuel at idle. A separate idle circuit, consisting of a small drilled passage and the idle mixture screw, meters fuel at low throttle. If this passage is gummed, no adjustment of the mixture screw will fix it.
Cleaning the idle circuit
With the carburetor removed: locate the idle mixture screw (on the side of the carb body, near the throttle shaft — may have a limiter cap). Count and record how many turns out it currently is from lightly seated. Remove it carefully. Spray carburetor cleaner into the idle passage opening and let it soak for 5–10 minutes. Blow clear with compressed air. Reinstall the mixture screw to your recorded position and test.
Adjusting the idle mixture screw
The idle mixture screw controls the air-fuel ratio at idle only. It does not affect full-throttle performance. Starting baseline is typically 1.5 turns out from lightly seated (not force-seated — just finger-tight until it stops). Adjust in 1/4-turn increments:
- Turn out (counterclockwise): richer at idle — the engine speed increases and smooths, then eventually goes rough again
- Turn in (clockwise): leaner at idle — the engine slows, may stumble
- The optimum is the position where idle speed is highest and smoothest, typically 1 to 2.5 turns out from lightly seated
After finding the idle mixture optimum, use the idle speed screw (the external screw that contacts the throttle plate lever — not the mixture screw) to set final idle RPM. Typical spec: 1,700–1,800 RPM for lawn equipment, 2,500–3,000 RPM for hand-held tools.
Rebuild vs replace: the honest cost math
A carburetor rebuild kit for most common Briggs & Stratton, Tecumseh, Honda, or Kawasaki carburetors costs $8–18 and includes the needle, needle seat, float, main jet, gaskets, and bowl O-ring. A complete aftermarket replacement carburetor for the same engines typically costs $15–35.
| Condition | Verdict | Why |
|---|---|---|
| Clean body, good throttle shaft, failed gaskets/needle/float | Rebuild | The body is the expensive part; kit restores everything that fails |
| Throttle shaft loose in bore (wiggles side to side) | Replace | Worn shaft bore creates an unfixable air leak; no rebuild kit addresses this |
| Cracks in the carb body or stripped threads | Replace | Structural damage can't be reliably repaired on a carb under vacuum |
| Severe varnish throughout all passages | Replace (usually) | Complete cleaning is possible but a replacement carb may cost less than the time to clean thoroughly |
| Rebuild failed to solve the problem | Replace | Worn throttle shaft or warped body; move on |
On many lawn tractors, walk-behind mowers, and handheld tools, a complete OEM-compatible aftermarket carburetor costs less than $30. There is no performance difference between a properly installed new carburetor and a properly rebuilt original. The decision is economic.
After any carburetor work: the adjustment sequence
- Set idle mixture screw to 1.5 turns out from lightly seated (the baseline — don't skip this even if you think the old setting was correct).
- Start the engine and allow it to warm up for 2–3 minutes at partial throttle.
- Set the idle speed screw to the lowest RPM that keeps the engine running.
- Adjust the idle mixture screw in 1/4-turn increments — out until rough, then back in until smooth. Find the peak.
- Use the idle speed screw to set final target idle RPM (see engine spec or owner's manual — typically stamped on the engine shroud).
- Rev the engine to full throttle briefly, then release back to idle. The engine should return to idle smoothly without dying. If it stumbles or dies, the idle mixture needs slight enrichment (turn out 1/8 turn) or the idle speed is set too low.
Gear for carburetor work
Smart eBay searches we'd start with ourselves. Affiliate links — same price for you, small commission for this site. Full disclosure.
 Carburetor rebuild kit
Briggs & Stratton and Honda carb rebuild kits include the needle, float, seat, and gaskets for $8–15. Search your model number for the correct kit — a generic kit often fits but check the float type.
Carburetor rebuild kit
Briggs & Stratton and Honda carb rebuild kits include the needle, float, seat, and gaskets for $8–15. Search your model number for the correct kit — a generic kit often fits but check the float type.
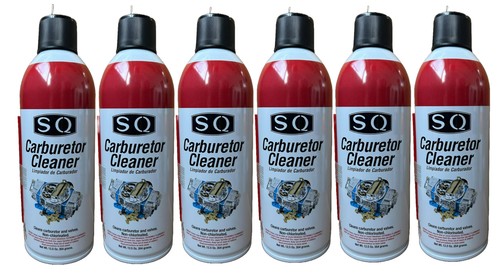 Carburetor cleaner spray
CRC Carb & Choke Cleaner and Gumout Carb Cleaner cut varnish deposits effectively. A can lasts for multiple cleanings. Spray, soak 5–10 minutes, then blow dry with compressed air.
Carburetor cleaner spray
CRC Carb & Choke Cleaner and Gumout Carb Cleaner cut varnish deposits effectively. A can lasts for multiple cleanings. Spray, soak 5–10 minutes, then blow dry with compressed air.
 Compression tester
A compression tester rules out mechanical causes before you spend time on the carburetor. 90 PSI is the minimum for most 4-stroke small engines. Read the engine cold for the most accurate baseline.
Compression tester
A compression tester rules out mechanical causes before you spend time on the carburetor. 90 PSI is the minimum for most 4-stroke small engines. Read the engine cold for the most accurate baseline.
 Precision flathead screwdriver set
Carburetor jets and mixture screws are soft brass. A correctly fitting flathead is essential — an undersized bit will strip the slot immediately. A set covering 1/8 to 1/4 inch tips handles most small-engine carbs.
Precision flathead screwdriver set
Carburetor jets and mixture screws are soft brass. A correctly fitting flathead is essential — an undersized bit will strip the slot immediately. A set covering 1/8 to 1/4 inch tips handles most small-engine carbs.
 Replacement carburetor (full)
Aftermarket replacement carbs for Briggs, Honda GX, and Tecumseh engines run $15–35. Often cheaper than a rebuild kit for common models. Search your engine model number for a direct-fit replacement.
Replacement carburetor (full)
Aftermarket replacement carbs for Briggs, Honda GX, and Tecumseh engines run $15–35. Often cheaper than a rebuild kit for common models. Search your engine model number for a direct-fit replacement.