The most common blending question in miniature painting forums is "what's the best technique?" The honest answer is that each of the three main techniques is best for specific combinations of scale, surface area, paint consistency, and working speed. Using wet blending on a 28mm Space Marine pauldron will frustrate most painters. Using glazing on a 75mm bust face works beautifully. The technique isn't wrong — the pairing is wrong.
This guide covers how each technique actually works, what it requires, what it fails at, and which scales and surface types it suits.
What "blending" means and what it doesn't
In miniature painting, blending describes the creation of a smooth gradual transition between two colors — usually a shadow tone, a midtone, and a highlight tone across the raised surfaces of a sculpt. The goal is to imply three-dimensional light hitting a surface, making the miniature read as a coherent object rather than a flat painted toy.
All three techniques achieve this goal. They differ in when the blending happens (on the palette, on the model while wet, or after drying through transparent layers) and in what skill they require most — speed, consistency, or patience. None of them is categorically harder than the others; they require different things from you at different points in the process.
Glazing: slow, forgiving, scales everywhere
Glazing is the technique of applying multiple very thin, transparent layers of paint over a dried base coat, building up color and value gradually. Each glaze layer is paint thinned to a high ratio — often 1 part paint to 5–10 parts medium or water — so it's nearly transparent. You apply it, let it dry, and apply the next one. The transition between tones emerges from the accumulation of thin layers rather than from blending wet paint.
How to execute a glaze
Start with a solid opaque base coat. Mix your glaze paint to a consistency where it flows smoothly off the brush but leaves almost no pigment behind in a single pass — if you can't see through the mixed glaze on a white palette, it's too thick. Apply with a soft flat brush or a well-pointed round, pulling the glaze across the shadow areas and letting it feather toward the midtone. Let it dry completely before the next layer. Build up 4–8 glazes to deepen the shadow. Highlight in the same way but with a lighter mix in the brightest areas.
What glazing excels at
- Building color depth without risking the transition looking striped or rushed
- Tinting surfaces — adding a warm OSL glow or a cold desaturation to shadow areas without repainting from scratch
- Smooth transitions on concave surfaces where wet blending is geometrically difficult
- Working slowly without time pressure — each layer dries before you touch it again
What glazing struggles with
- Speed: 6+ thin drying layers takes time, even with a hairdryer between coats
- Mud risk: too many layers of different colors glaze into grey-brown if you're not careful about the color relationships
- Very small areas: the feathering radius of a glaze layer needs at least a few millimeters of surface to show a transition
Scale suitability: all scales, but most natural at 54mm+
Glazing works at 28mm but the transitions need to be concentrated — you're glazing 2–3mm of surface to create the shadow on a cheek or an armour plate. At 54mm and above, glazing is an excellent primary technique because you have enough surface area for the layers to build naturally. At 75mm and 90mm (display busts and large figures), glazing is the professional-grade default because it creates genuine color depth, not just value shifts.
Two-brush blending: fast, controllable, the 28mm workhorse
Two-brush blending (also called blending back or feathering) uses two brushes simultaneously: one loaded with paint, one clean and barely damp to pull and feather the wet edge of the loaded brush's stroke before it dries. You place a small amount of paint on the surface, then immediately use the second brush to pull, soften, and blend the wet edge into the existing color.
How to execute two-brush blending
Keep a wet palette to maintain consistent paint consistency. Load your first brush with paint thinned to a creamy consistency — not watery, but smooth. Apply a small stroke to the surface. Immediately pick up your second brush (just barely damp, wiped almost dry on a paper towel), and gently pull the wet edge of the stroke, feathering it out. The second brush picks up and redistributes the wet paint, softening the hard edge. Work section by section, not the entire surface at once — if you try to cover too large an area, the first strokes dry before you can get back to them.
What two-brush blending excels at
- Speed relative to glazing — you're creating the transition in one pass rather than accumulating layers
- Working in tight areas like 28mm faces, hands, and small armour sections where you need control
- Matching colors to existing work — you're applying the correct shade directly rather than tinting through transparent layers
- Army painting: once the rhythm is established you can work faster than any other blending method
What two-brush blending struggles with
- Humidity and temperature dependence: on a hot dry day, the paint dries before you can feather it; on a cold humid day, it stays wet so long it moves when you don't want it to
- Very large surfaces (75mm+ busts): covering a large area with consistent wet-feathering is physically difficult before sections dry at the edges
- Over-blending: aggressive second-brush action can pick up too much paint and leave the surface looking pale and washed out
Scale suitability: 28mm to 40mm most reliable
Two-brush blending is the primary technique that competitive painters use for tournament-quality 28–32mm scale miniatures. The surface area is small enough to work section by section before things dry, large enough for the transitions to show at normal viewing distance (an arm's length). At 15mm and below, the surface area is too small for meaningful transitions to develop. At 54mm+, the technique works but requires faster hands or an extender medium to slow drying time.
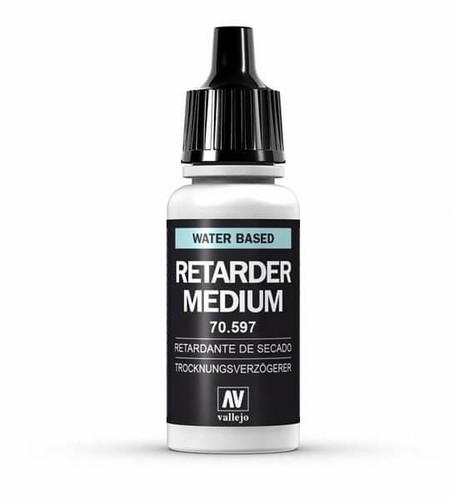
Working time tip: Adding a medium that slows drying time — Vallejo Drying Retarder, Golden Open Medium, or even a drop of glycerine — extends the working time of your paint significantly. At 28mm with humid conditions, you may not need it. On a 54mm bust in a dry room, you almost certainly do.
Wet blending: the highest ceiling, the hardest floor
Wet blending involves mixing two or more colors together while they're both wet on the surface of the miniature. You apply your shadow color and your highlight color to the same area simultaneously and then use a brush to physically mix them at the boundary until the transition is smooth. Everything happens in one session while the paint is still open.
How to execute wet blending
Load your brush with your shadow color and apply it to the shadow area. Without letting it dry, load your second brush with your highlight color and apply it to the highlight area, letting the two colors just touch at the transition zone. Use a clean damp brush (or the shadow brush with less paint) to gently work the boundary, pulling small amounts of each color into the other. You're physically mixing the paints on the surface. Work slowly and with minimal pressure — you want to move paint, not scrub it.
Wet blending requires paints that stay wet for long enough to work. Some paint lines are formulated with faster drying times that make wet blending difficult. Oils mixed with mineral spirits (commonly used for busts and display miniatures) are the ideal medium for wet blending because they stay open for 30–60 minutes or longer depending on environment.
What wet blending excels at
- Creating seamless color transitions where no layer boundary is visible, even under macro photography
- Large surface areas — a 90mm bust face can be wet blended in a single session because you have the time and surface
- Oil paints: oils are the canonical wet blending medium and produce the smoothest results of any paint type on display-quality pieces
- Color mixing on the surface — you can create colors that don't exist in your palette by mixing on the miniature itself
What wet blending struggles with
- Small surface areas: at 28mm, the two colors meet in a space of 1–2mm. By the time you've applied both, the first is already drying in a room-temperature environment.
- Water-based acrylics: fast-drying acrylics require retarder additives to work for wet blending; even with additives, the window is short
- Precision: wet blending can spread paint into areas you didn't intend to affect
- Recovery: if wet blending goes wrong, it goes wrong all at once — you often need to start the section over
Scale suitability: 54mm and above, especially with oils
Wet blending is most practical and most rewarding at 54mm and above. At this size, the surface areas of individual planes — a cheek, a forehead, a shoulder — are large enough to apply both colors and blend them before the paint closes. With oil paints on a 75mm or 90mm bust, wet blending is the primary technique used by competition-level painters. Smaller scales demand faster hands or retarder additives and still produce less reliable results than the other two techniques.
Comparison at a glance
| Technique | Best scale | Speed | Forgiveness | Best paint type |
|---|---|---|---|---|
| Glazing | All, best 54mm+ | Slow | High — layers fix mistakes | Acrylics, inks |
| Two-brush blending | 28–40mm | Medium | Medium | Acrylics on wet palette |
| Wet blending | 54mm+ | Fast once set up | Low — wrong spread quickly | Oils, slow acrylics |
Mixed technique approaches by use case
Most experienced painters don't pick one technique and use it exclusively — they select by surface and purpose.
28mm army batch painting. Two-brush blending for armor plates and large cloth areas; no-blend drybrushing for texture areas (fur, chainmail, rough stone); spot glazing to correct transitions that look striped.
28mm display single mini. Two-brush blending as base technique with glazing over the top for depth and OSL color. Wet blending reserved for the face if scale permits, often combined with a retarder medium.
54mm competition piece. Glazing for armor and fabric; wet blending on skin (especially faces) using Vallejo retarder-extended acrylics or an oil layer over acrylic basecoat; two-brush for intermediate details.
75mm+ display bust. Oil wet blending for skin — full face and neck in a single wet session; glazing for color adjustments and OSL afterward; two-brush for smaller detail areas like eyes and lips where precision matters more than transition range.
The practical starting point
If you're new to all three techniques and painting 28mm miniatures:
- Start with glazing. It's the most forgiving and teaches you the most about how thin paint builds value. Ruin a layer — glaze over it. The slower pace lets you think between coats.
- Once your color mixing is confident, add two-brush blending for speed. Keep a wet palette and commit to small sections. Two or three sessions of deliberate practice at 28mm produces usable results faster than any other technique.
- Try wet blending on something you don't care about — a spare model, an off-cut of primed plastic. Do it with acrylics extended with retarder first, then with oils when you're ready to commit to the setup cost.
Scale matters because it constrains your options physically, not because one technique is more legitimate than another. Glazing on a 28mm figure isn't a compromise — it's the most reliable path to smooth transitions at that size. Wet blending on a 75mm bust isn't showing off — it's using the technique that the surface area actually supports.