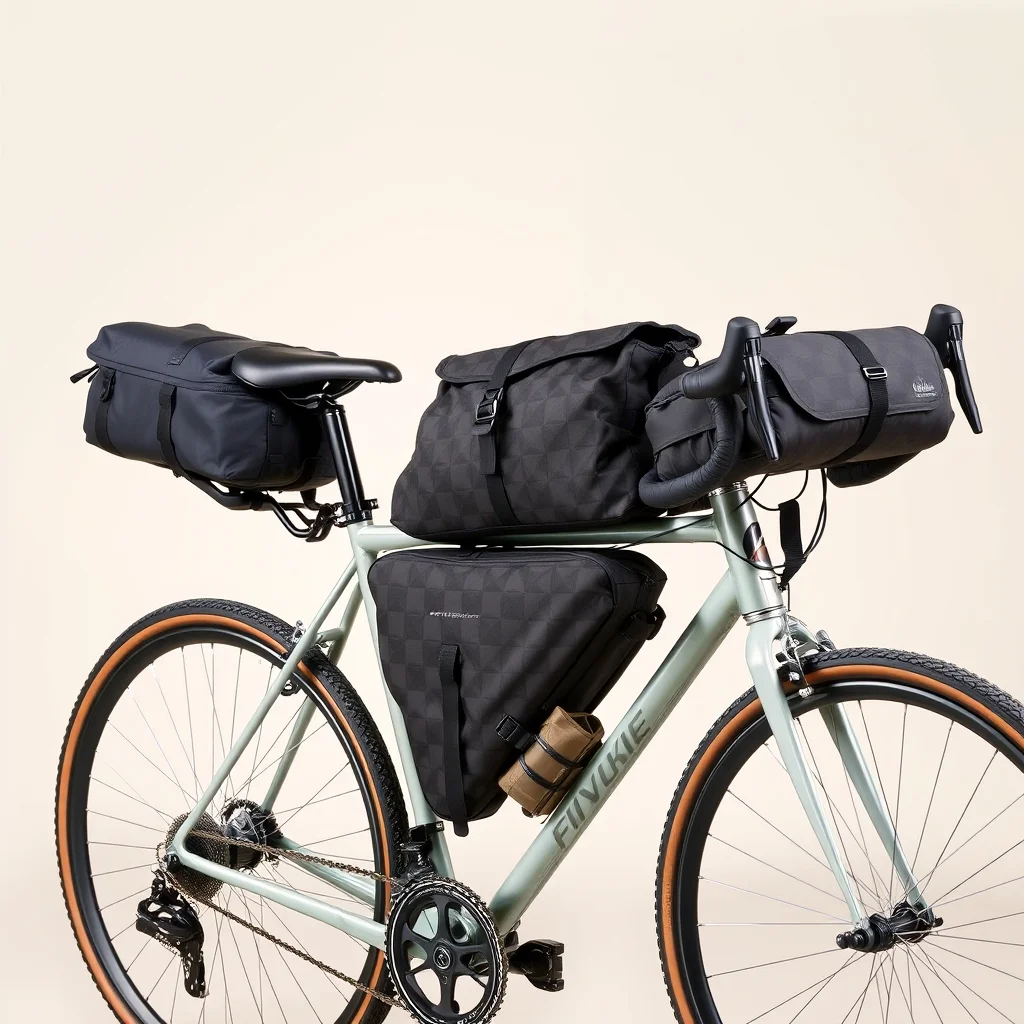
The bikepacking bag system: three main positions
A standard bikepacking setup uses three primary bag positions, each with different capacity potential and packing logic:
- Handlebar roll / bag: Attaches to the handlebar via two straps. High-volume, easily accessible, but affects steering weight slightly. Best used for compressible, lightweight items like sleeping bags, quilts, and tent poles.
- Frame bag: Fills the main triangle. Heaviest items go here — food, tools, battery packs — because weight at the bike's center has the least handling impact. Volume is limited by triangle size, typically 2–10 L depending on frame.
- Seat pack / seatbag: The highest single-volume position, typically 6–16 L. Carries sleeping kit, shelter, and clothing. The pendulum effect of a heavy seat pack at the rear affects handling on rough terrain.
Additional positions often added: top tube bags (quick-access snacks and phone), fork cages (water bottles or extra volume), and gas tank bags between the stem and headtube. These supplement the big three rather than replacing them.
| Position | Typical Volume | Best Items | Handling Impact |
|---|---|---|---|
| Handlebar roll | 6–18 L | Sleeping bag, quilt, tent poles, puffy jacket | Low-medium (front) |
| Frame bag | 2–10 L | Food, tools, water, electronics | Low (center) |
| Seat pack | 6–16 L | Bivy/tent, clothing, extra layers | Medium-high (rear) |
| Top tube bag | 0.5–2 L | Snacks, phone, cash, lip balm | Minimal |
| Fork cages | 2× 0.75–1 L | Water bottles, fuel canisters | Low (front) |
Frame bag: measuring your triangle
Frame bags come in two types: custom (cut to your specific frame geometry, typically ordered from smaller makers like Revelate Designs or Swift Industries) and universal (adjustable straps, designed to fit a range of triangles).
Measuring for a frame bag:
- Top tube length: Measure from the head tube to the seat tube along the top tube (inside edge, horizontal).
- Down tube length: From head tube to bottom bracket along the down tube (inside edge).
- Seat tube length: From bottom bracket to where the seat stays diverge, along the seat tube.
Most universal frame bags specify a max top tube length and approximate triangle area they fit. The common problem: full-suspension bikes with a suspension linkage in the main triangle — the linkage reduces available space significantly, often requiring a half-frame bag rather than a full-frame bag that would interfere with shock travel.
Seat pack: volume, sag, and attachment
Seat packs are the highest-volume bag position, but their capacity rating is theoretical — how much you can actually use depends on how firmly you pack it and how much sag you're willing to accept.
Tail sag
A seat pack weighing more than roughly 2–3 kg (or packed loosely with soft items) will droop toward the rear wheel, especially on rough terrain. Tail sag has two problems: it can contact the rear tire (causing wear or heat damage to the bag), and it shifts the bike's center of gravity rearward, degrading handling. Heavy, dense items (food, tools, camping stove) belong in the frame bag, not the seat pack. The seat pack is for lightweight volume — sleeping quilts, tent, and clothing.
Attachment types
Seat packs attach in two places: a strap around the seatpost and two smaller straps around the saddle rails. The saddle rail attachment is where sag originates — if the rail straps aren't cinched down tightly, the bag pivots and sags. Some premium seat packs add a stabilizer strap to the chainstay to reduce movement; this adds security but removes dropper post compatibility in most setups.
Shopping for bikepacking bags? Browse current eBay listings → (we earn a small commission; your price is unchanged).
Handlebar rolls: packing and width compatibility
Handlebar rolls (also called handlebar bags or feed bags when smaller) mount via two or three straps that wrap around the bar. The harness system is critical — a poorly designed harness allows the roll to spin forward under braking, which creates a safety problem and unpacks your carefully rolled sleeping bag onto the trail.
Quality harnesses use a frame that holds the roll horizontal and resists rotation. Look for a separate harness piece (rather than integrated straps) and check that it's compatible with your bar width. Most modern mountain bike and gravel bike bars are 680–800 mm wide; standard bikepacking handlebar harnesses accommodate this range.
Packing a handlebar roll correctly: place the sleeping bag or quilt at the center, roll tightly, compress laterally, and strap firm. The outer diameter determines whether the roll fits the harness size spec — oversized bags won't cinch down properly. Keep the total weight under roughly 3–4 kg in the handlebar roll; heavier loads affect steering noticeably.
Waterproofing: construction methods compared
Bikepacking bags face sustained exposure to rain, wet trail spray, and mud. Waterproofing quality varies significantly, and understanding the construction methods helps you match the bag to your conditions.
Welded seam (fully waterproof)
The fabric panels are RF-welded (heat-bonded) rather than sewn, eliminating needle holes that admit water. Often combined with a roll-top closure. This is the highest waterproofing standard — bags from Revelate Designs, Ortlieb, and others use welded construction. Heavier and more expensive than DWR bags, but fully reliable in sustained rain.
DWR-treated fabric with taped seams
Durable Water Repellent (DWR) coating sheds light rain; taped seams reduce ingress at stitch lines. This is the most common mid-range construction. It handles rain showers well but will eventually wet through in sustained heavy rain (several hours+). The DWR coating degrades with use and can be refreshed with a wash-in treatment.
Drybag liner approach
A non-waterproof bag with a separate drybag liner inside — the bag protects the liner from abrasion, the liner provides the waterproofing. Cheaper entry point. Trade-off: packing and unpacking requires removing and repacking the liner, which is slower than a single-unit roll-top.
Rackless vs rack setups
Traditional bike touring uses front and rear racks with panniers. Bikepacking replaced racks with the frame-mount bag system. The trade-offs are real:
- Rackless (bikepacking bags): Lighter total system, better trail handling, lower center of gravity when loaded correctly, compatible with full-suspension bikes (racks often incompatible or interfere with suspension). Total capacity typically 20–30 L. Better for off-road and singletrack.
- Rack + panniers: Higher total capacity (40–60 L easily), better for carrying heavy rigid items (books, camera gear, groceries), more accessible packing/unpacking, established system for long-distance road touring. Heavier, not suitable for singletrack or off-road riding.
For mountain biking or gravel riding with technical sections, rackless bikepacking bags are the correct system. For paved touring or mixed-surface routes where you're carrying more than 25 L, a rear rack or mixed system (front rack + bikepacking rear) is worth considering.
Building a system incrementally
You don't need all three bags at once. A reasonable starting sequence:
- Top tube bag first: Cheapest (often $20–$50), immediately useful for day rides to carry phone, snacks, and tools. Low commitment.
- Seat pack second: Adds overnight camping capacity for a one-bag minimalist overnight trip. Choose 8–10 L rather than maximum volume to avoid sag issues while you're learning to pack tightly.
- Frame bag third: Adds food and tool storage once you're doing multi-day trips. Measure your triangle first — don't buy until you've confirmed dimensions.
- Handlebar roll last: Adds the most bulk and is most useful for trips where you're carrying a full camping kit. The harness and roll system takes more practice to pack efficiently.
Search eBay for bikepacking bags
 Bikepacking Seat Pack
8–16 L. Check saddle rail attachment method and whether it's dropper-compatible if you have one.
Bikepacking Seat Pack
8–16 L. Check saddle rail attachment method and whether it's dropper-compatible if you have one.
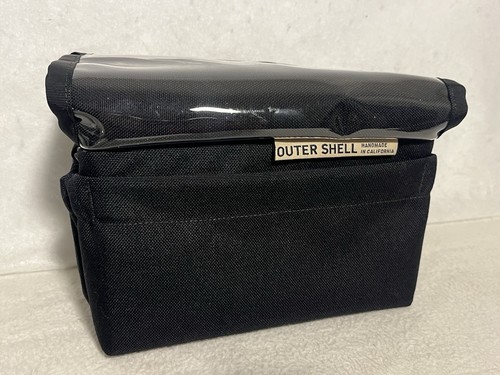 Handlebar Bag / Roll
Verify harness bar diameter compatibility. Check for anti-rotation design on the harness.
Handlebar Bag / Roll
Verify harness bar diameter compatibility. Check for anti-rotation design on the harness.
 Frame Bag
Measure your triangle first. Half-frame for FS bikes or water bottle access; full-frame for max volume.
Frame Bag
Measure your triangle first. Half-frame for FS bikes or water bottle access; full-frame for max volume.