Cone temperature guide: Orton bending tables vs digital pyrometers

Your pyrometer says 2232°F. Your witness cone disagrees. Here's why they measure different things — and how to use both so your glazes behave consistently.
The problem with trusting just one instrument
The Orton cone system has been central to ceramics since 1896. It's reliable, reproducible, and cheap. Digital pyrometers are fast, real-time, and readable without opening the kiln. The mistake most potters make is treating them as interchangeable. They aren't. They answer different questions, and understanding what each one actually measures is the foundation of consistent glaze results.
When your glaze comes out underfired, or when the surface texture is wrong, or when two loads fired to "the same temperature" look different — the cone-vs-pyrometer relationship is almost always where the diagnosis starts.
What a cone actually measures: heat work
A pyrometric cone is a small pyramid made from ceramic materials blended specifically to deform at a particular point. When enough energy has moved through the cone material, it bends. The key phrase is "enough energy" — because a cone doesn't just measure temperature, it measures heat work: the combined effect of both temperature and time.
Consider two identical kilns. Kiln A reaches 2232°F in four hours and cuts power immediately. Kiln B reaches 2232°F over twelve hours. Both pyrometers will show the same peak temperature, but the clay and glaze in Kiln B have absorbed significantly more total energy. The cone bending temperature will be different. Your glazes will look different. The pyrometer saw the same number, but the heat work was different.
This is why cones are the standard reference in ceramics and pyrometers are the monitoring tool. Cones respond the way your clay body and glaze respond — because they're made from similar silica-alumina-flux combinations. A pyrometer is measuring air temperature; a cone is measuring what's happening to your material.
The Orton bending table: what the numbers mean
Orton publishes bending temperatures for each cone at three standard heating rates: 27°F/hour (15°C/hour), 108°F/hour (60°C/hour), and 270°F/hour (150°C/hour). The same cone bends at different temperatures depending on how fast you're heating, because faster heating gives the material less time to absorb energy at any given temperature. You have to go hotter to do the same heat work faster.
The practical implication: if your kiln ramps faster than the reference rate, the cone will bend at a higher pyrometer reading than the table shows. If your kiln ramps slower, it bends at a lower reading. Most electric kilns in a typical glaze firing climb at roughly 100–150°F/hour during the final segment, which puts them close to the 108°F/hour reference — but this varies considerably by kiln, load density, and program.
| Cone | Temp at 27°F/hr | Temp at 108°F/hr | Temp at 270°F/hr |
|---|---|---|---|
| Cone 010 | 1623°F / 884°C | 1657°F / 903°C | 1679°F / 915°C |
| Cone 06 | 1798°F / 981°C | 1828°F / 998°C | 1855°F / 1013°C |
| Cone 04 | 1922°F / 1050°C | 1945°F / 1063°C | 1971°F / 1077°C |
| Cone 1 | 2109°F / 1154°C | 2138°F / 1170°C | 2163°F / 1184°C |
| Cone 6 | 2195°F / 1202°C | 2232°F / 1222°C | 2269°F / 1265°C |
| Cone 10 | 2305°F / 1285°C | 2345°F / 1307°C | 2381°F / 1305°C |
Source: Orton Ceramic Foundation. These are Large Cone temperatures. Small Cones (used in kiln-sitters) run approximately 5°F lower and should not be mixed with Large Cone data when troubleshooting.
Ramp rate is the biggest variable most potters ignore
The difference between 108°F/hour and 270°F/hour for Cone 6 is 37°F on the pyrometer — but same heat work into your glaze. If your controller is programmed for a fast final ramp and you're comparing your pyrometer reading to the 108°F/hour column in the Orton table, you'll think you're firing low when you're actually hitting the right cone.
The most accurate way to bring your firing into alignment with the published tables is to slow the final ramp to 100–120°F/hour for the last 200–300°F before target. Many kiln controllers let you program a "final approach" segment at a reduced rate. Skutt's KilnMaster and L&L's Easy-Fire controllers both handle this. This lets the clay and glaze absorb heat more uniformly and makes your pyrometer readings more comparable to the Orton reference.
A soak (hold) at top temperature has a similar effect. A 10-minute hold at Cone 6 is roughly equivalent to 15–20 additional degrees of temperature in terms of heat work delivered. Many potters who fire to 2200°F + 10-minute hold are hitting effective Cone 6 results even when the pyrometer is technically below the bending point for that cone at the listed rate.
Where pyrometers err: thermocouple drift
Type K thermocouples — the standard type in most electric kilns — drift over time. A thermocouple that reads accurately when new will typically read 15–40°F low after 200–300 firings. A kiln that's been in service for two or three years without thermocouple replacement may be telling you 2200°F when the kiln is actually 2240°F, or vice versa. You can't see the drift happening, because there's no reference point — you're comparing your readings to themselves.
The symptom of a drifting thermocouple is gradual change in glaze results with no change in your firing program. If a glaze that once looked correct has been appearing slightly underfired for the past year despite no recipe changes, thermocouple drift is the most likely cause. Thermocouples cost $20–40 and take ten minutes to replace. If you can't remember when you last changed it, change it.
Some controllers (Skutt, L&L) let you enter an offset correction. Before applying an offset, fire a load with witness cones and compare the actual bending temperature to what the pyrometer shows. If your Cone 6 cone bends when the pyrometer reads 2195°F, enter a +37°F correction so the controller will cut power at the right point. But note: the offset corrects for thermocouple drift, not for kiln-to-kiln variation or placement differences. Fix the thermocouple first, then tune the offset.
How to use both tools together
The correct workflow is straightforward: use the pyrometer for monitoring and the cone for confirmation. The pyrometer tells you where you are in the firing; the cone tells you whether you got there.
Every glaze firing should include at least one witness cone pack. A standard pack contains three consecutive cones: one below target, one at target, one above. Place the pack 2–3 inches from the bottom peephole, angled at 8 degrees (the Orton standard) against a small clay pad. When you peek through the peephole during firing, you should see the guard cone starting to bend just before you expect target temperature, then the target cone bend fully, then the over-cone remain upright.
Compare the pyrometer reading when your target cone fully bends to what the Orton table predicts for your firing rate. If they consistently agree, your thermocouple is in good shape and your firing rate is calibrated. If the cone bends 30°F low, your thermocouple is reading high (or you're firing slow). If it bends 40°F high, your thermocouple is reading low (or you're firing fast). Adjust your program or enter a correction — don't just memorize "my Cone 6 is really 2195°F" and move on, because that number will change as the thermocouple continues to drift.
Placement: why your top cone and bottom cone don't agree
Most electric kilns have uneven heat distribution. Elements run at the top and bottom of the kiln, and the middle section receives heat by conduction and radiation from both sides. The result is that the top of the kiln fires hotter than the bottom in many older or poorly loaded kilns.
This is why placing witness cones at multiple levels matters. If your top cone shows a full Cone 6 bend but your bottom cone only shows Cone 5, you have a 30°F temperature gradient in your kiln. Solutions: redistribute your load so heavier, more mass-dense pieces go at the top (they absorb more heat and slow the rise at that level); fire slower overall to give heat time to equalize; or check that your bottom elements are functioning — an element that's half-failed will cause exactly this pattern.
When troubleshooting a gradient, place witness cones at three levels: top, middle, and bottom. Run a firing with no sellable work — just cones and clay test rings. The results will tell you exactly what's happening in each zone of your kiln and let you make targeted adjustments rather than guessing.
Common cone-firing mistakes
- Reusing cones. A cone that has been partially heated has already begun to react. Reused cones bend earlier and give misleading results. Buy fresh cones for every firing.
- Wrong cone lean. Cones placed too vertically (90 degrees) bend later than they should. Orton specifies 8 degrees of lean, angled in the direction the cone will fall. A clay pad with a groove or a commercial cone stand keeps the angle consistent.
- Trusting peak pyrometer temperature alone. The pyrometer's highest reading during a firing is not equivalent to cone temperature unless your ramp rate matches the Orton reference. A rapid spike to 2300°F and immediate shutoff is not the same as a steady climb to 2232°F at 108°F/hour, even though the pyrometer shows 2300°F in one case and 2232°F in the other.
- Comparing kilns without accounting for thermocouple state. Two potters firing to "Cone 6" on their respective kilns may be doing very different things if one has a new thermocouple and the other has a three-year-old one. Always compare cones, not pyrometer readings, when communicating with other potters about firing results.
- Skipping the peephole check. Programming a kiln and walking away means you have no confirmation of when the target cone bent. If the controller has a fault — thermocouple failure, element failure — you'll find out when you open the kiln. Check the peephole at least once per firing during the final 50°F approach to target.
Practical takeaways
Use Orton Large Cones as your truth reference. Program your kiln to approach the final 200°F at a controlled rate of 100–120°F/hour, and include a 10–15 minute soak at target temperature. Replace your thermocouple if you haven't in two years or 200+ firings. Compare cone bending temperature to the Orton table at your actual ramp rate to calibrate any offset correction. When your glaze results change without a recipe change, check the cone first — it will tell you whether the kiln changed or whether your materials changed.
The pyrometer is the dashboard. The cone is the odometer. Both matter, and neither one alone gives you the full picture.
Gear worth having for accurate firings
Honest eBay picks. We earn a small commission on qualifying purchases — here's how that works.
 Orton Large Cones (cone 6, 10, 06)
The standard witness cones. Buy at least one box of your target cone and the cone above. Don't reuse.
Orton Large Cones (cone 6, 10, 06)
The standard witness cones. Buy at least one box of your target cone and the cone above. Don't reuse.
 Thermocouple replacement (Type K)
Type K is standard in Skutt and L&L kilns. Replace every 200 firings or when readings start drifting. $20–35.
Thermocouple replacement (Type K)
Type K is standard in Skutt and L&L kilns. Replace every 200 firings or when readings start drifting. $20–35.
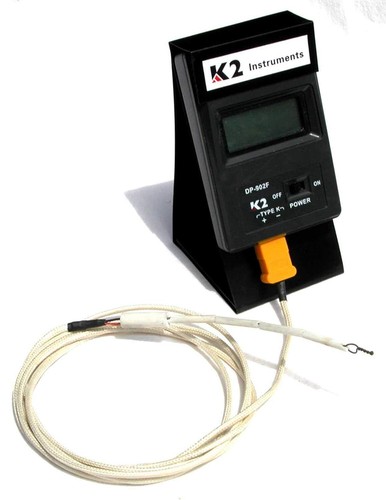 Digital kiln pyrometer
A handheld pyrometer with a probe lets you check kiln temperature at the peephole without a built-in controller.
Kiln shelf wash (alumina hydrate)
Apply to shelves before every glaze firing. Mix 50/50 alumina and kaolin. Prevents glaze runs from fusing to shelves.
Digital kiln pyrometer
A handheld pyrometer with a probe lets you check kiln temperature at the peephole without a built-in controller.
Kiln shelf wash (alumina hydrate)
Apply to shelves before every glaze firing. Mix 50/50 alumina and kaolin. Prevents glaze runs from fusing to shelves.
 Skutt KilnMaster / programmable controller
A programmable controller lets you set custom ramp rates, soaks, and offsets. Saves electricity and gives repeatable results.
Skutt KilnMaster / programmable controller
A programmable controller lets you set custom ramp rates, soaks, and offsets. Saves electricity and gives repeatable results.